Ispmanager is a paid multifunctional server control panel designed to simplify work with VPS. It allows you to solve all basic tasks, including website creation and configuration, mail account management, file manager, monitoring, server analysis and much more.
Ispmanager has an intuitive interface that allows you to quickly and efficiently solve typical VPS management tasks without using a terminal and complicated programs.
Installation of the ispmanager control panel on Ubuntu OS is done in a couple of clicks. The standard components of the panel are quite demanding on resources, so we recommend a VPS configuration with 2 GB of RAM, 2 CPU cores and 20 GB of disk space.
Due to its flexibility and reliability, ispmanager is the ideal choice for anyone looking for a simple and user-friendly server management solution without the need for administrative skills.
This control panel allows you to manage projects, secure them and customize your web environment – and all from an ispmanager user interface with a dark or light theme.
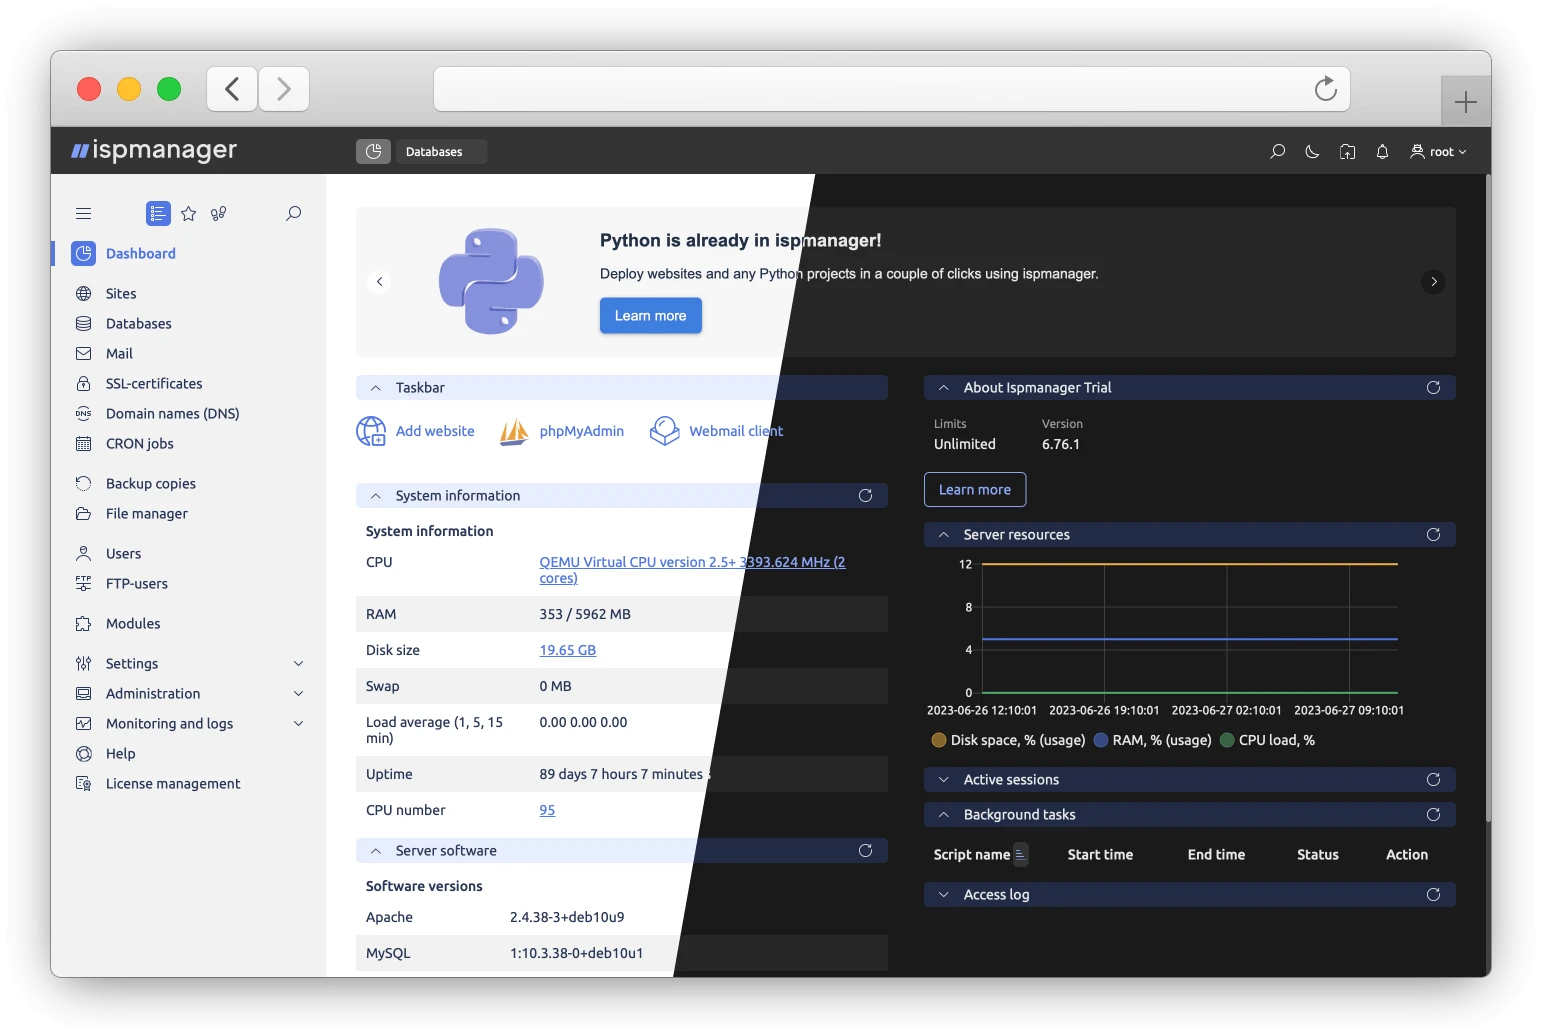
Beget VPS with a pre-installed ispmanager is a ready-to-use and fully customized control panel on your Ubuntu 22.04-based virtual server.
Ispmanager features
This control panel is available in three versions. The difference between them is the presence of Docker functionality on pro and host versions, as well as limitations on the number of sites and ispmanager pricing.
- ispmanager lite is the best choice for managing several sites (up to 10 sites);
- ispmanager pro is good for working with Docker and dozens of sites (up to 50 sites);
- ispmanager host is usually chosen by large companies that need an unlimited number of sites and work with Docker.
Here are just a few of the features of ispmanager hosting control panel:
- Working with web projects and sites – file manager, database connection, SSL certificates installation, setting up DNS, creating and managing corporate email, using ispmanager backup and restore and automating Cron jobs in ispmanager.
- Implementing and managing custom projects via ispmanager dashboard – shell client, code editor, Docker, programming language support (PHP, Python and JS) and package managers (PIP, NPM and Composer).
- Supporting multiple users and connecting projects with different settings – rights differentiation, access restriction, alternative versions and modes, working with databases (MariaDB, Percona Server and PostgreSQL), CMS (WordPress, Drupal, Bitrix, Joomla, etc.) and Linux servers (Apache, Nginx and OpenLiteSpeed).
- Protecting sites from unauthorized introduction to the web server with ispmanager, attacks and malicious scripts – ImunifyAV antivirus, firewall, DNSBL, Fail2ban, antiddos, DDoS Guard, 2FA, DNSSEC technology, spam filters for mail, black and white lists.
- Provision of technical SEO – this SEO-friendly control panel has a Google PageSpeed module, caching, optimization of static content on the site, and regular ispmanager updates.
- Supporting all panel users – access to help information and bug logging system and active community forum.
You can test this user-friendly control panel for free by running the online ispmanager demo from the official website.
Installing and working with ispmanager
No additional parameters need to be specified when installing a server. Once the virtual server is created, it will take a few minutes to deploy the latest version of ispmanager on it. The ispmanager installation status will be displayed in the control panel. You will receive a notification when the ispmanager installation is complete.
To access the web interface of the ispmanager control panel, use the access button to the installed server management software in the panel or open the address: https://ip-address:1500/.
The access data will be sent to the account contact e-mail after the installation is completed.
Getting started
Creating a site
To add a site, you need to go to the "Sites" section in the left menu and click on the "Create a site" button.
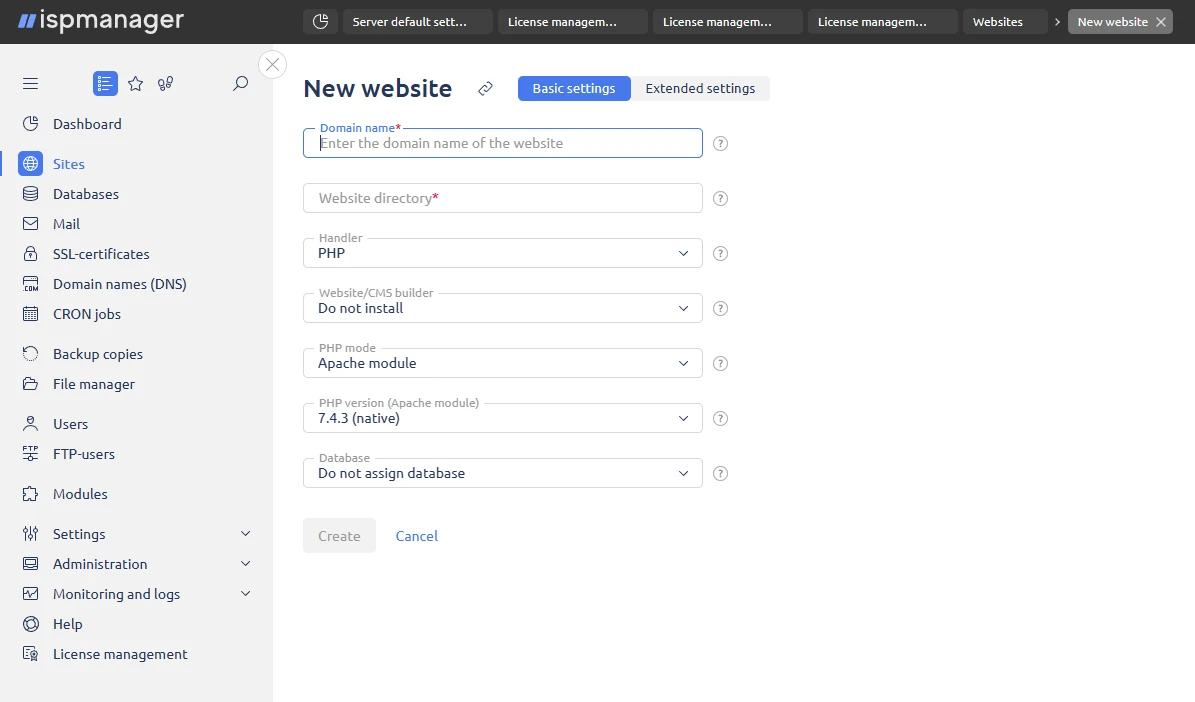
Specify the domain of the site, select the necessary parameters and click "Create".

Creating a database
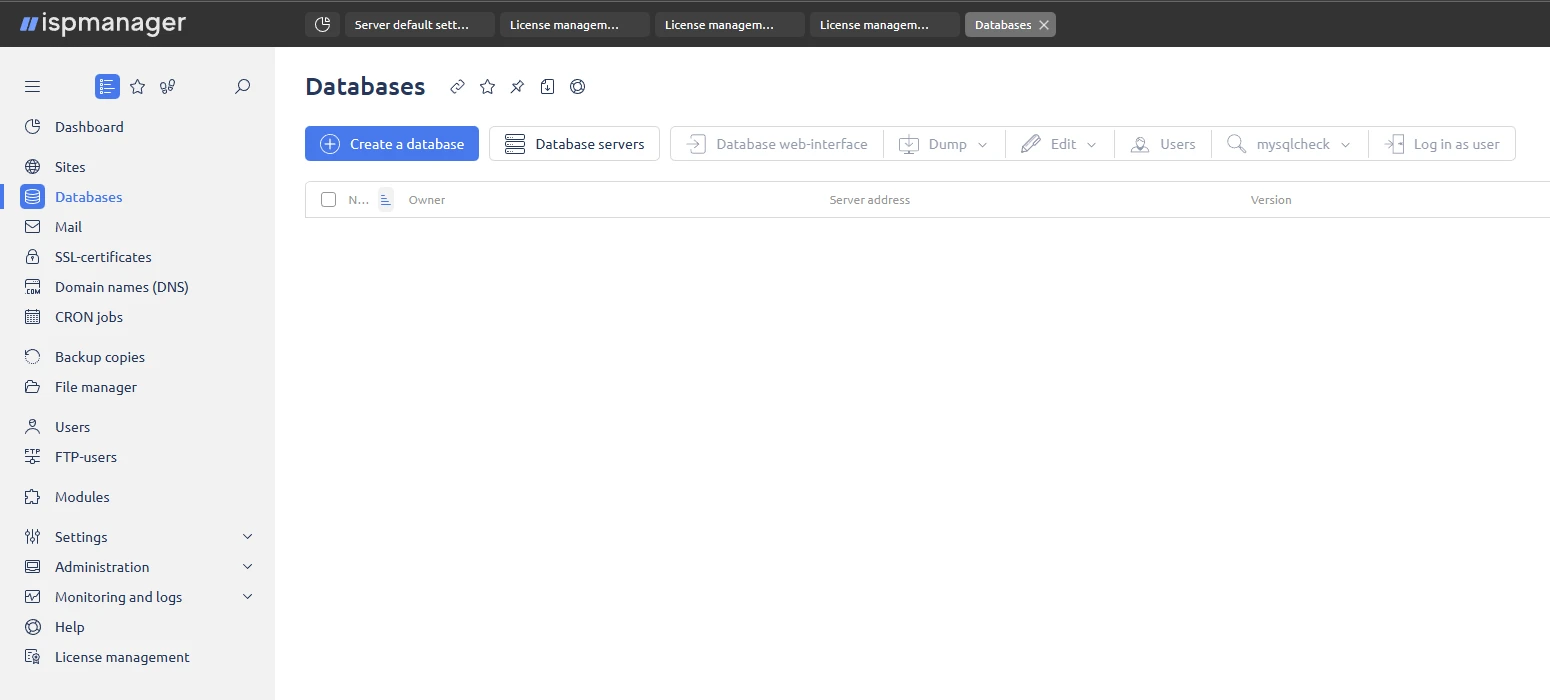
To create a database, go to the "Databases" section and click the "Create a database" button.
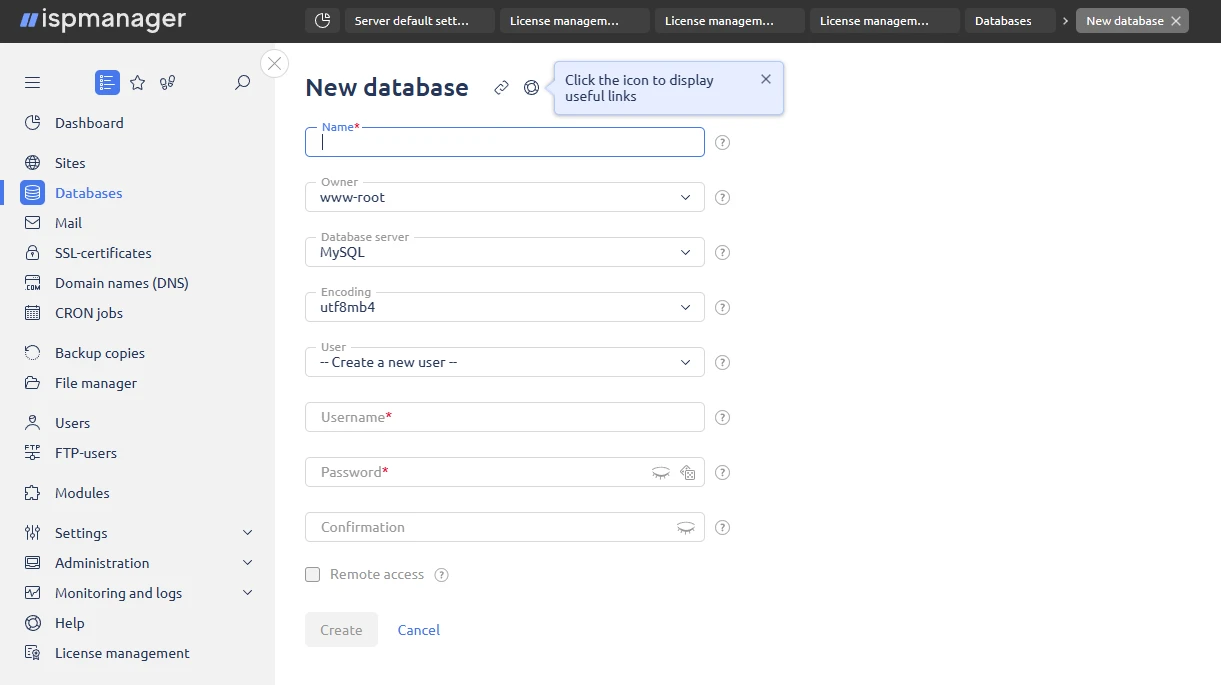
Specify the name of the database, user login and password, select other parameters, and then click "Create".
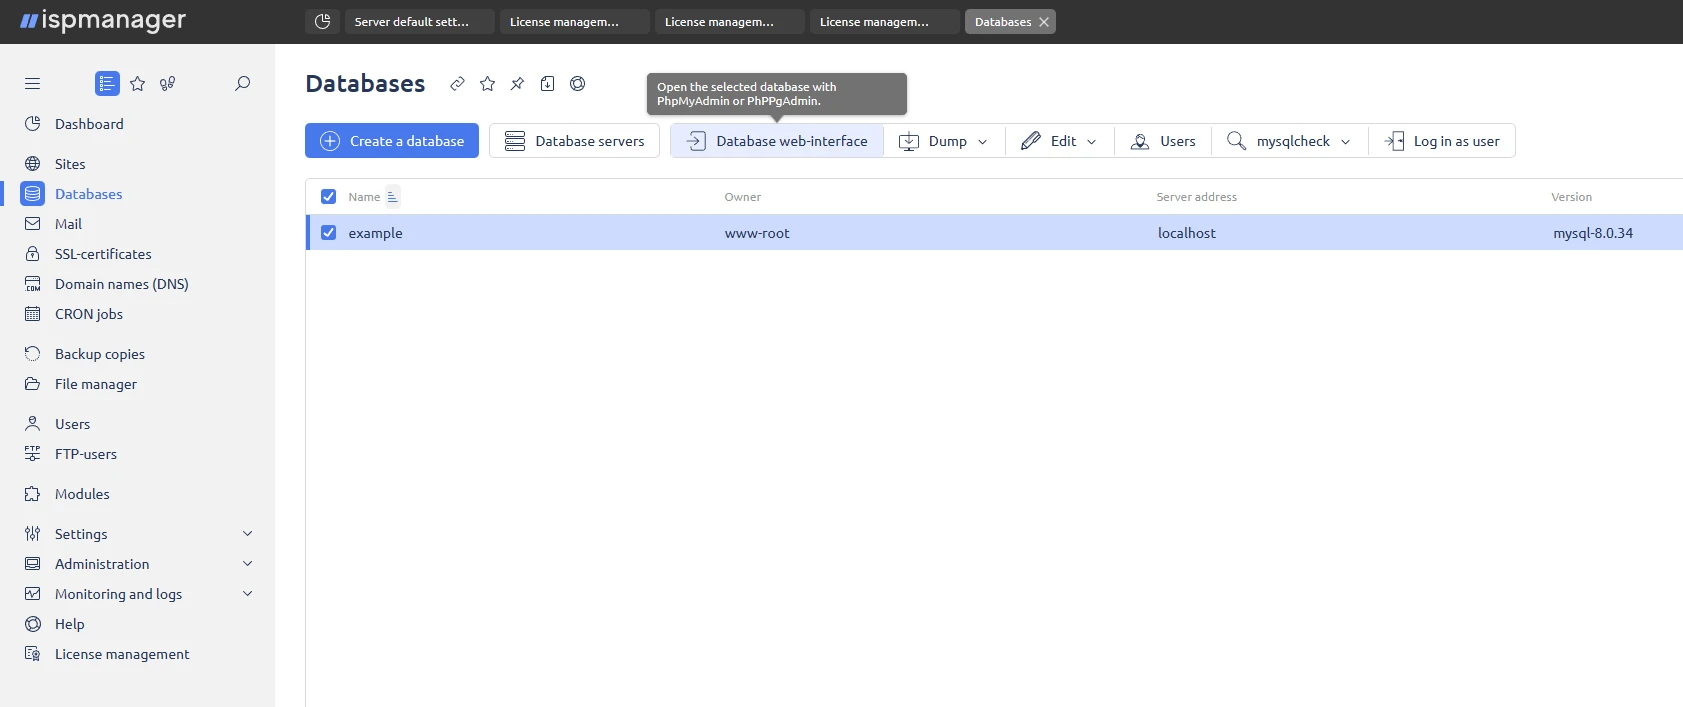
The phpMyAdmin web interface is available for working with the database. To access it, select the database in the list and click "Database web-interface" in the top menu.
We wish you good luck with server management with ispmanager!
FAQ
We will do everything ourselves and free of charge for you. To apply for transferring your site from shared hosting to VPS, you can write a ticket to technical support.
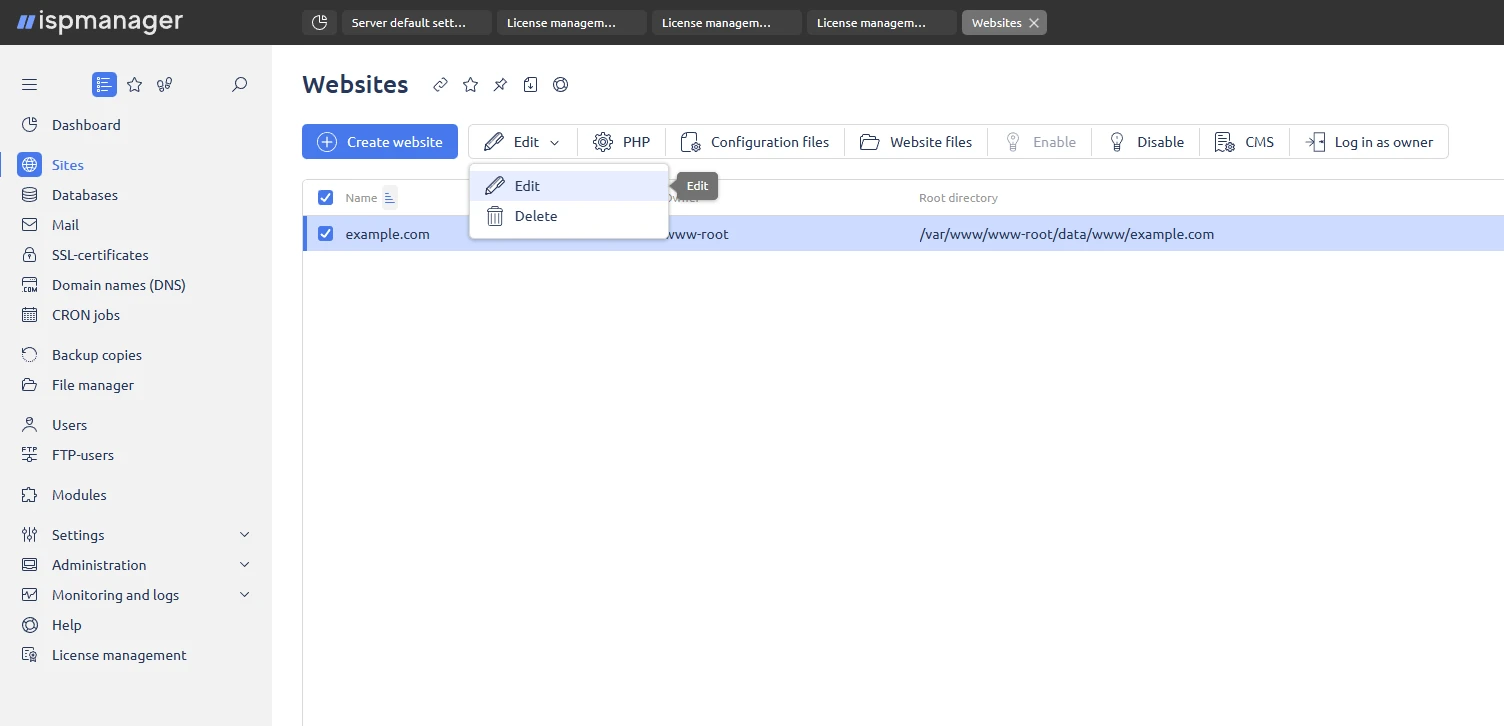
To select a version for PHP hosting management you need to go to the "Sites" section in the left panel, select a site in the list and click "Edit" in the top menu.
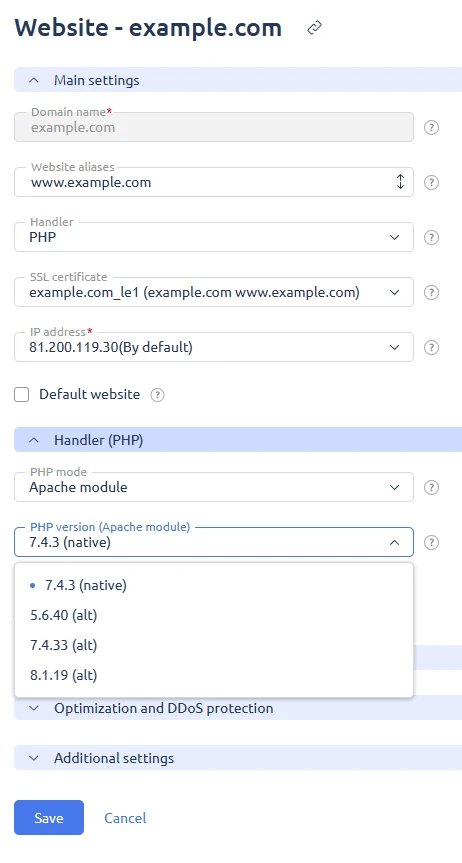
On the page that opens, expand the "Handler (PHP)" section, select the desired PHP version and click "Save".
If the desired version is not in the settings, go to "Settings" -> "PHP Settings" in the left menu.
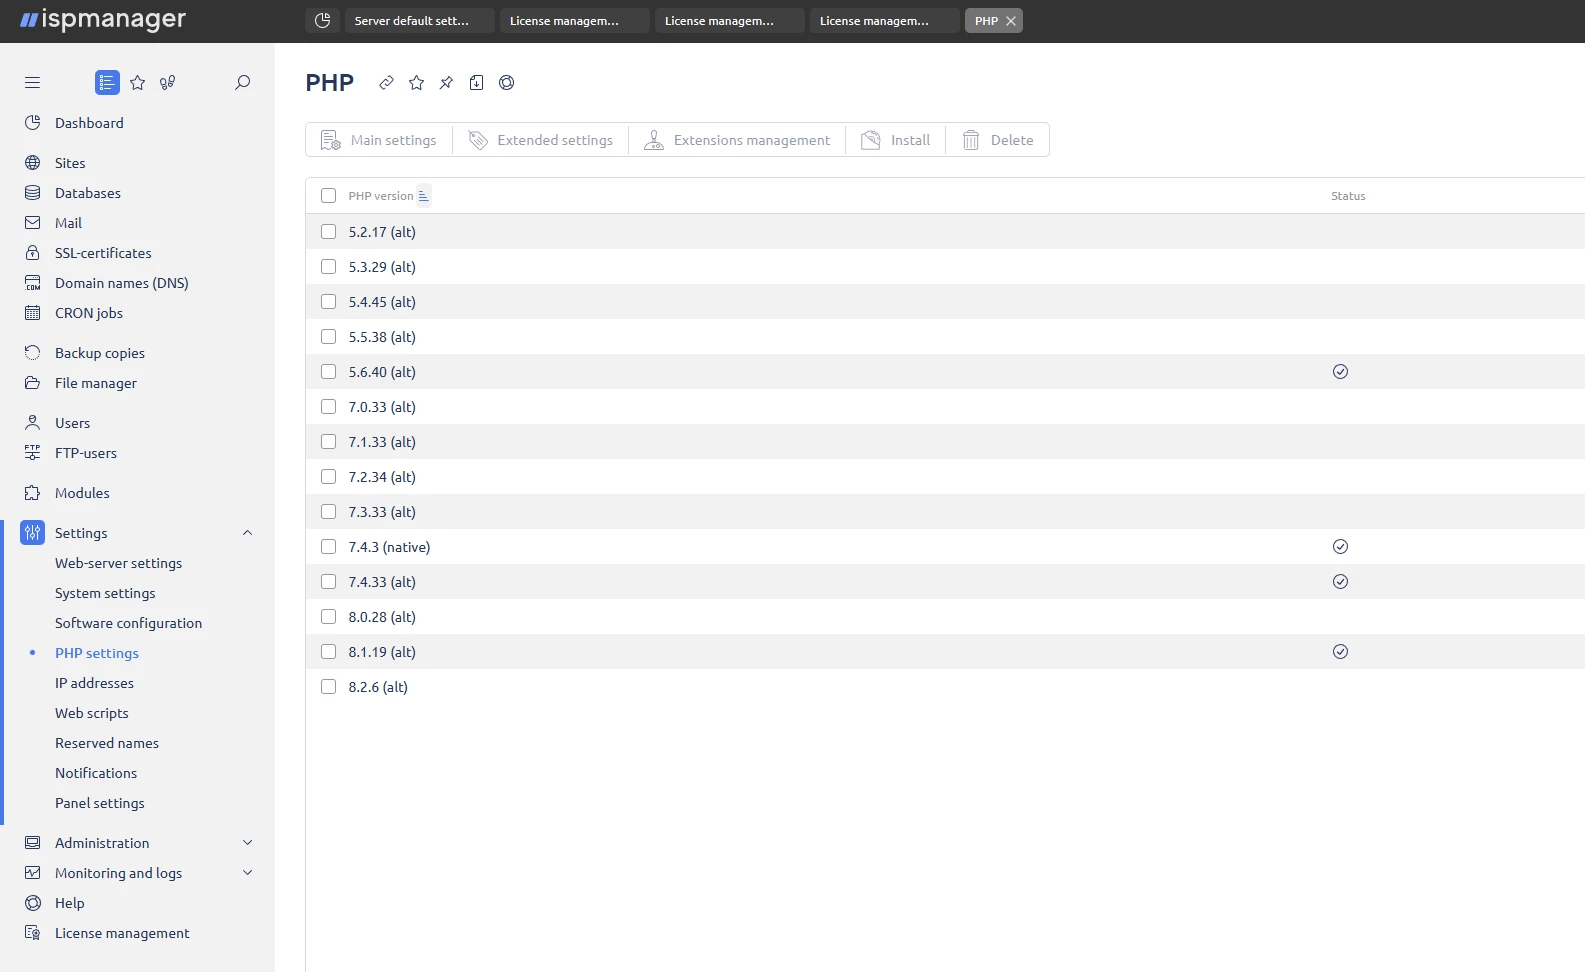
Select the desired version in the list and click the "Install" button in the top menu.
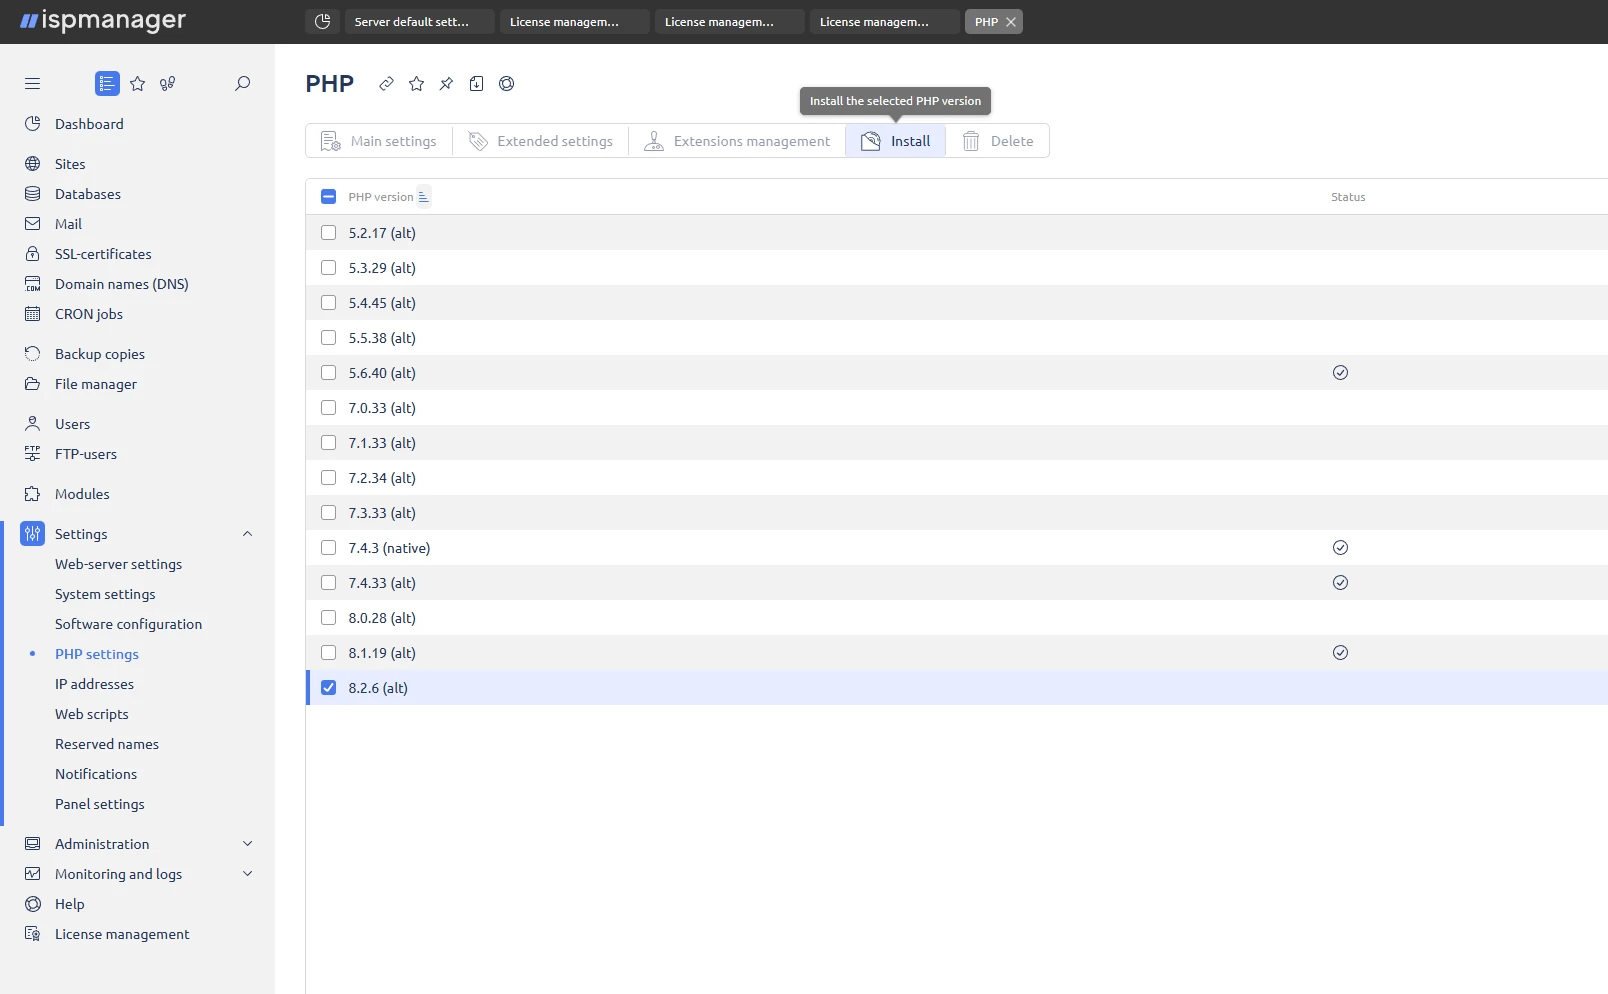
After the installation is complete, the version will become available in the site settings.
SSL certificate is configured during site creation. If you missed its configuration when creating your site or want to change/reissue/etc. it, go to the "SSL certificates" section.
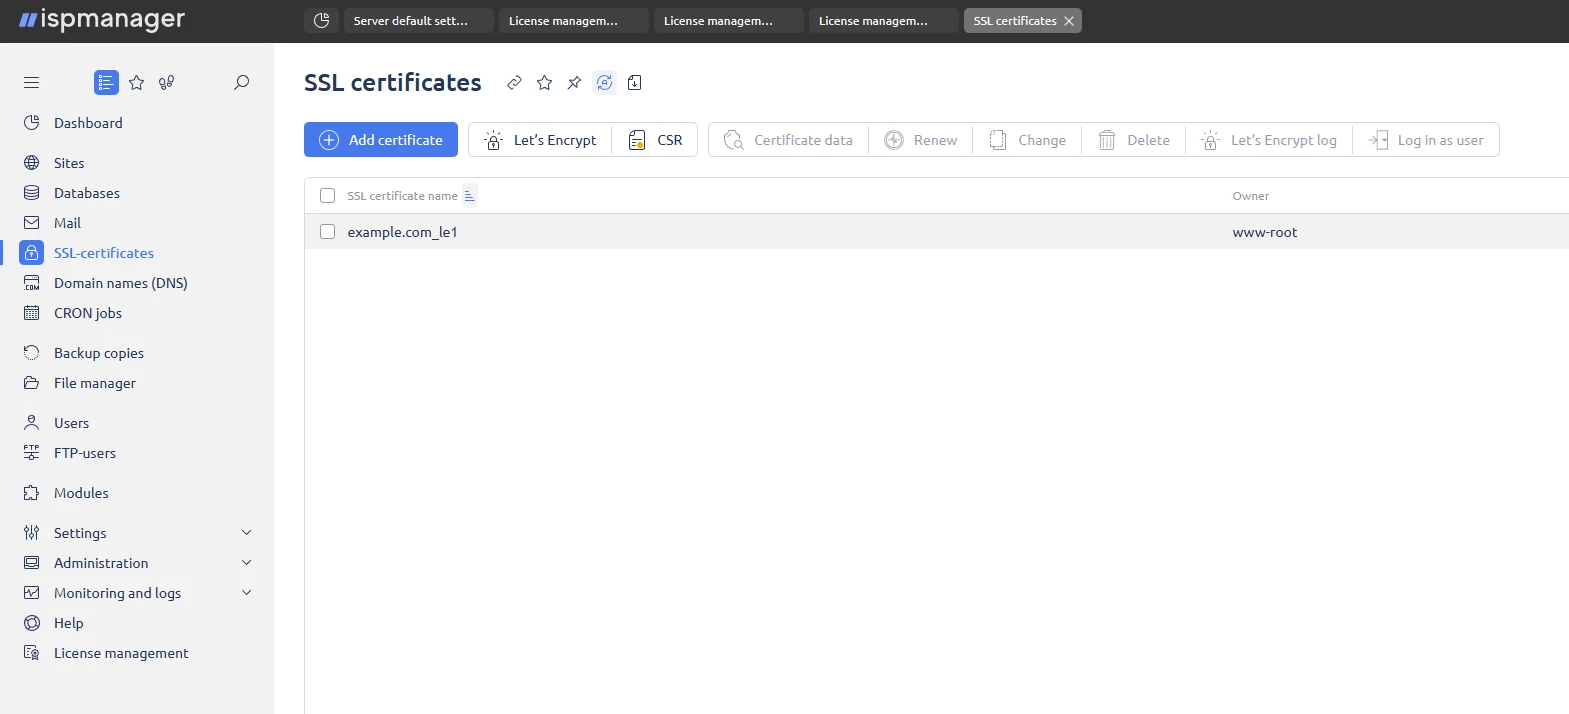
By clicking on the "Add Certificate" button, you can install a self-signed or third-party certificate.
By clicking on the "Let's Encrypt" button, you can issue a free SSL certificate from Let's Encrypt.
